Using Kate's Git Features
Git support in Kate landed almost 2 years ago but so far it is undocumented. I am writing this article in order to fill this gap and hopefully make more people aware of the git related features that Kate has.
To be able to use git functionality you need to enable at least two plugins
- Project plugin (commit / status / branch compare / stashing / file history)
- Documents Plugin (file history)
- Git blame (git blame support)
Once the project plugin is enabled and you are in a git repository, you will have the git toolview in your left sidebar:
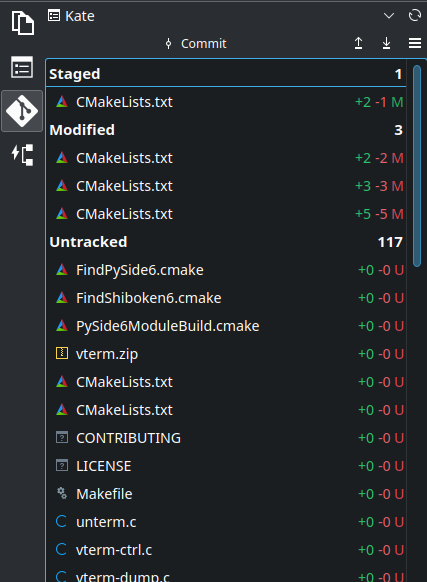
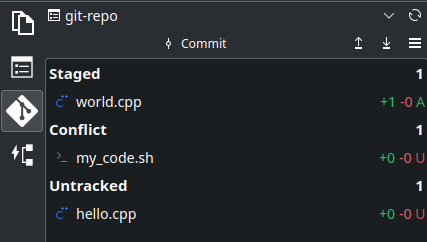
The toolview shows git status of the git repository of the currently open document. There are 4 "top level" nodes as you can see. Staged refers to the files that are staged and will be committed if you run git commit ... **Modified **refers to the files that you were already present in your repository but you changed them. **Conflict **refers to the files that have conflicts. Finally, **Untracked **files are those files which your repository doesn't know about.
On the right edge, you can see +1, -2 (numstat) which basically shows you the number of changes in each file.
To be able to Stage/Unstage a file, you can just double click on a file and it will get staged if it was unstaged or unstaged if it was staged. But this can be tedious if you have a lot of files to stage so you can use the context menu (right click menu) to stage/unstaged many files at once:
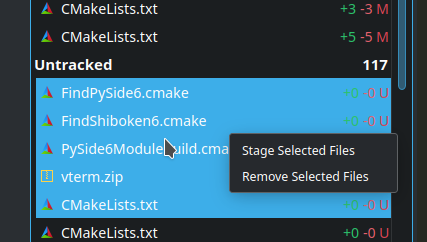
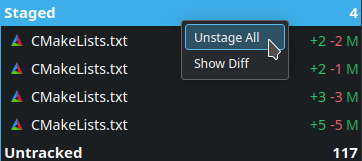
- Stage Selected Files will stage all the files in the selection
- Remove Selected Files will remove all the files!
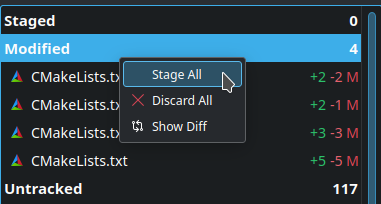
- Stage All will all stage all the files
- Unstage All will all unstage all the files
- Discard All will discard all your changes!!
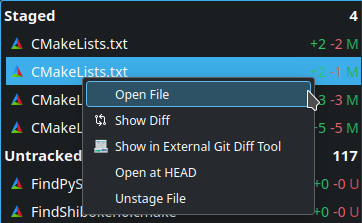
- Show Diff will open a diff of all the files under that node.
- Show in External Git Diff Tool will open your configured git diff-tool. See https://git-scm.com/docs/git-difftool
- Open at HEAD will open the file and show you its contents as they are currently committed i.e., at HEAD. This can be useful if you have many changes in your file and you want to see what the unmodified file looks like
Each top level node shows the number of files in it on the right side. For e.g., in the above screenshot it is 117 for the Untracked node.
Once you have staged a file, you can commit it either from the gui or command line as you wish. If you want to commit via the gui just click the Commit button at the top. Which will show you the following dialog:
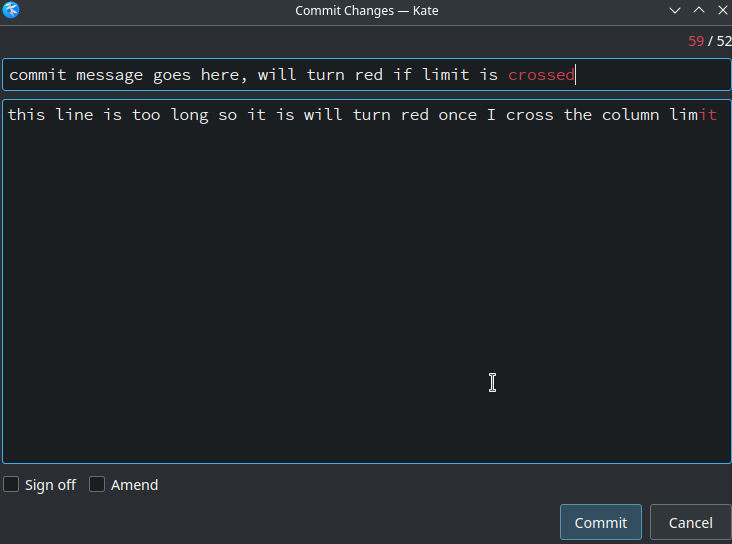
Nothing much to say about it. There are two checkboxes at the bottom left corner.
Amend will amend the commit instead of adding a new one
Sign Off just adds a sign off message in the commit description
Once you click commit changes will be committed asynchronously and you will see a message about it in the Output toolview at the bottom
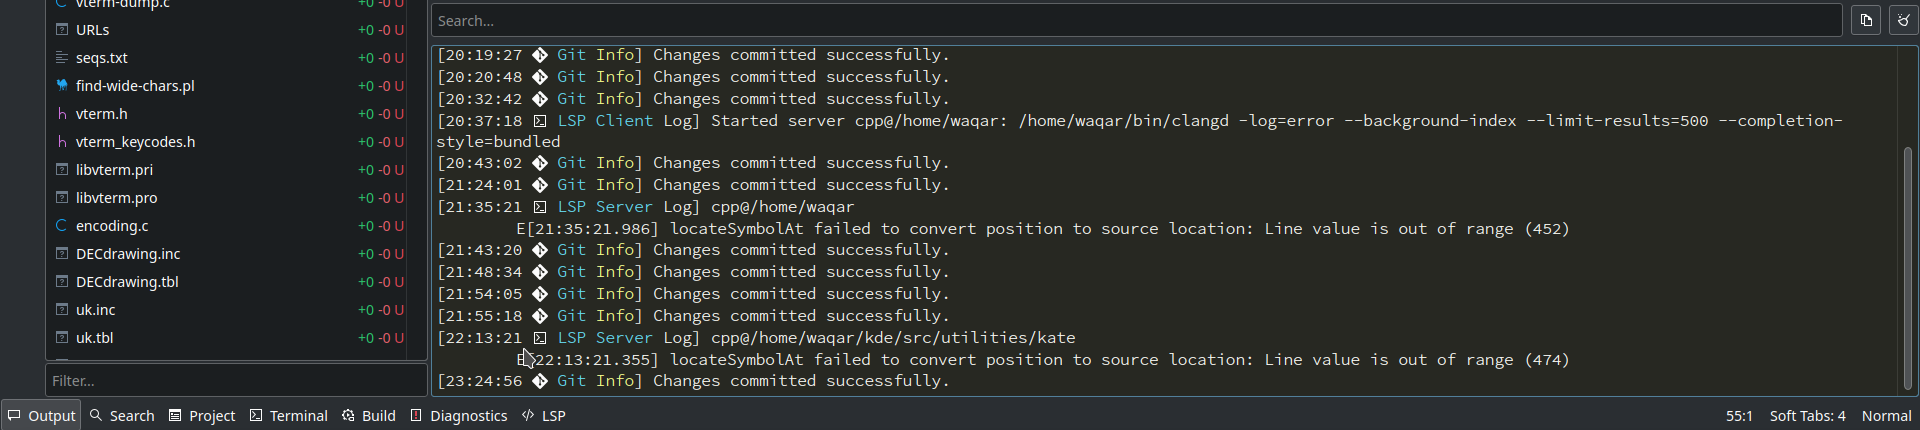
Once you have committed the changes, you can push them from the gui via the button with up arrow.
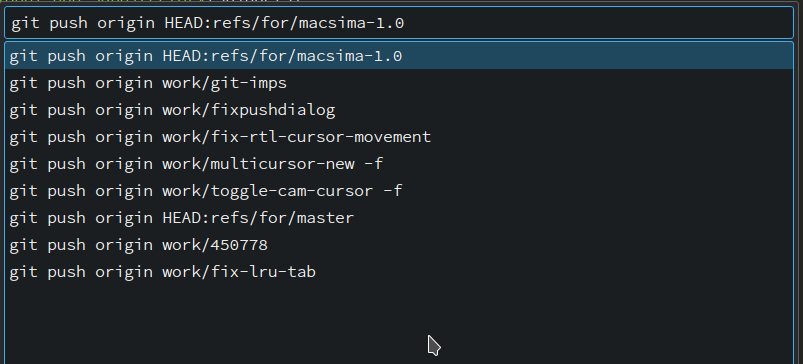
The command displayed in the line edit will be executed as is to push the changes. Similarly you can pull in the changes with the button with down arrow.
Sometimes the git status can be slightly out of date. In that case you can manually trigger a refresh by clicking the button at top right corner:

In addition to the basic stuff, there are some more features that can be access from the hamburger menu under the refresh button:
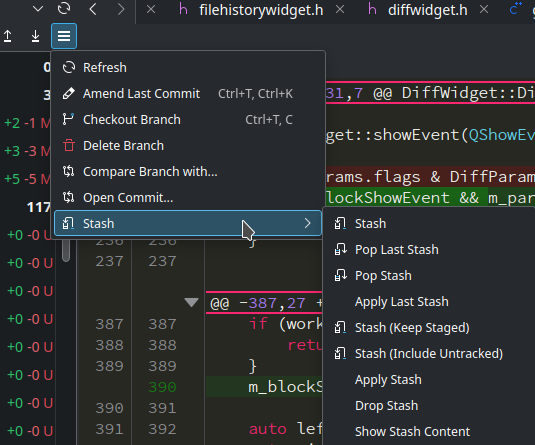
Refresh - refreshes git status
Amend Last Commit opens the commit dialog with 'amend' mode checked and last commit already loaded
Checkout Branch allows you to change current branch or create a new branch
Delete allows you to delete branches.
Compare Branch With can be used to compare current branch with a branch of your choice
Open Commit will open the specified commit in the Commit toolview. You can then browse all the changed files in that commit.
Stash offers git stash functionality
Current Branch
Current branch can be seen in the bottom right corner in the statusbar. The shown branch will be refreshed on changing the file and will always correspond to the repository the current file belongs to. This features is only available in current master (23.04 unreleased)

If you click the branch, it will allow you to change the branch or create a new one.
Commit Toolview
Commit toolview is useful to browse the changes inside a commit. It lists all the changed files in a commit on the left side in the below screenshot along with the number of changes in each file. On clicking a file, the diff of that file for the selected commit will be shown.
File History
You can browse the git history of a file by either right clicking in the Project tree or the Documents plugin tree and selecting Show File Git History

Once you click that, a new toolview will open with a list of commits particular to that file.
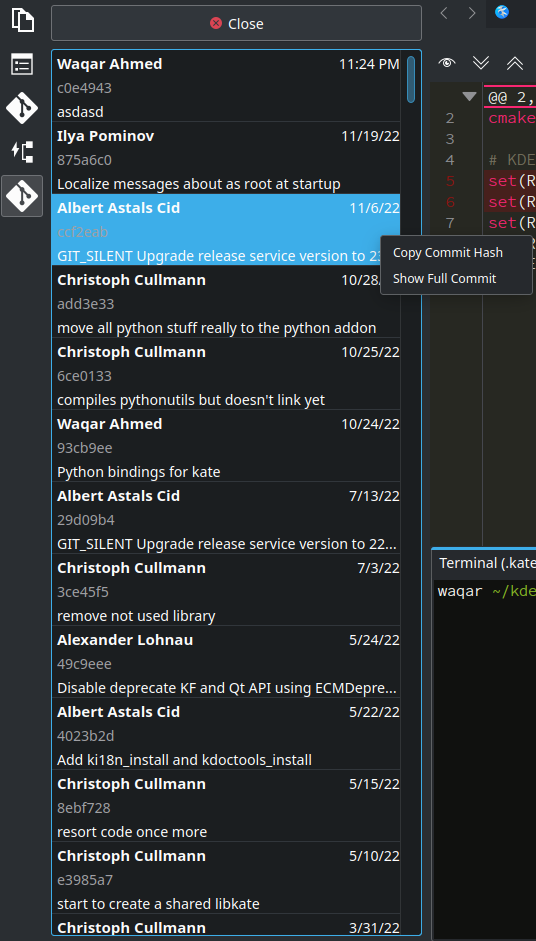
Clicking a commit will show the diff for that commit.
If you want to see all the changes in the commit, right click and select Show Full Commit. This will open the selected commit in Commit toolview which I showed above. (23.04 unreleased)
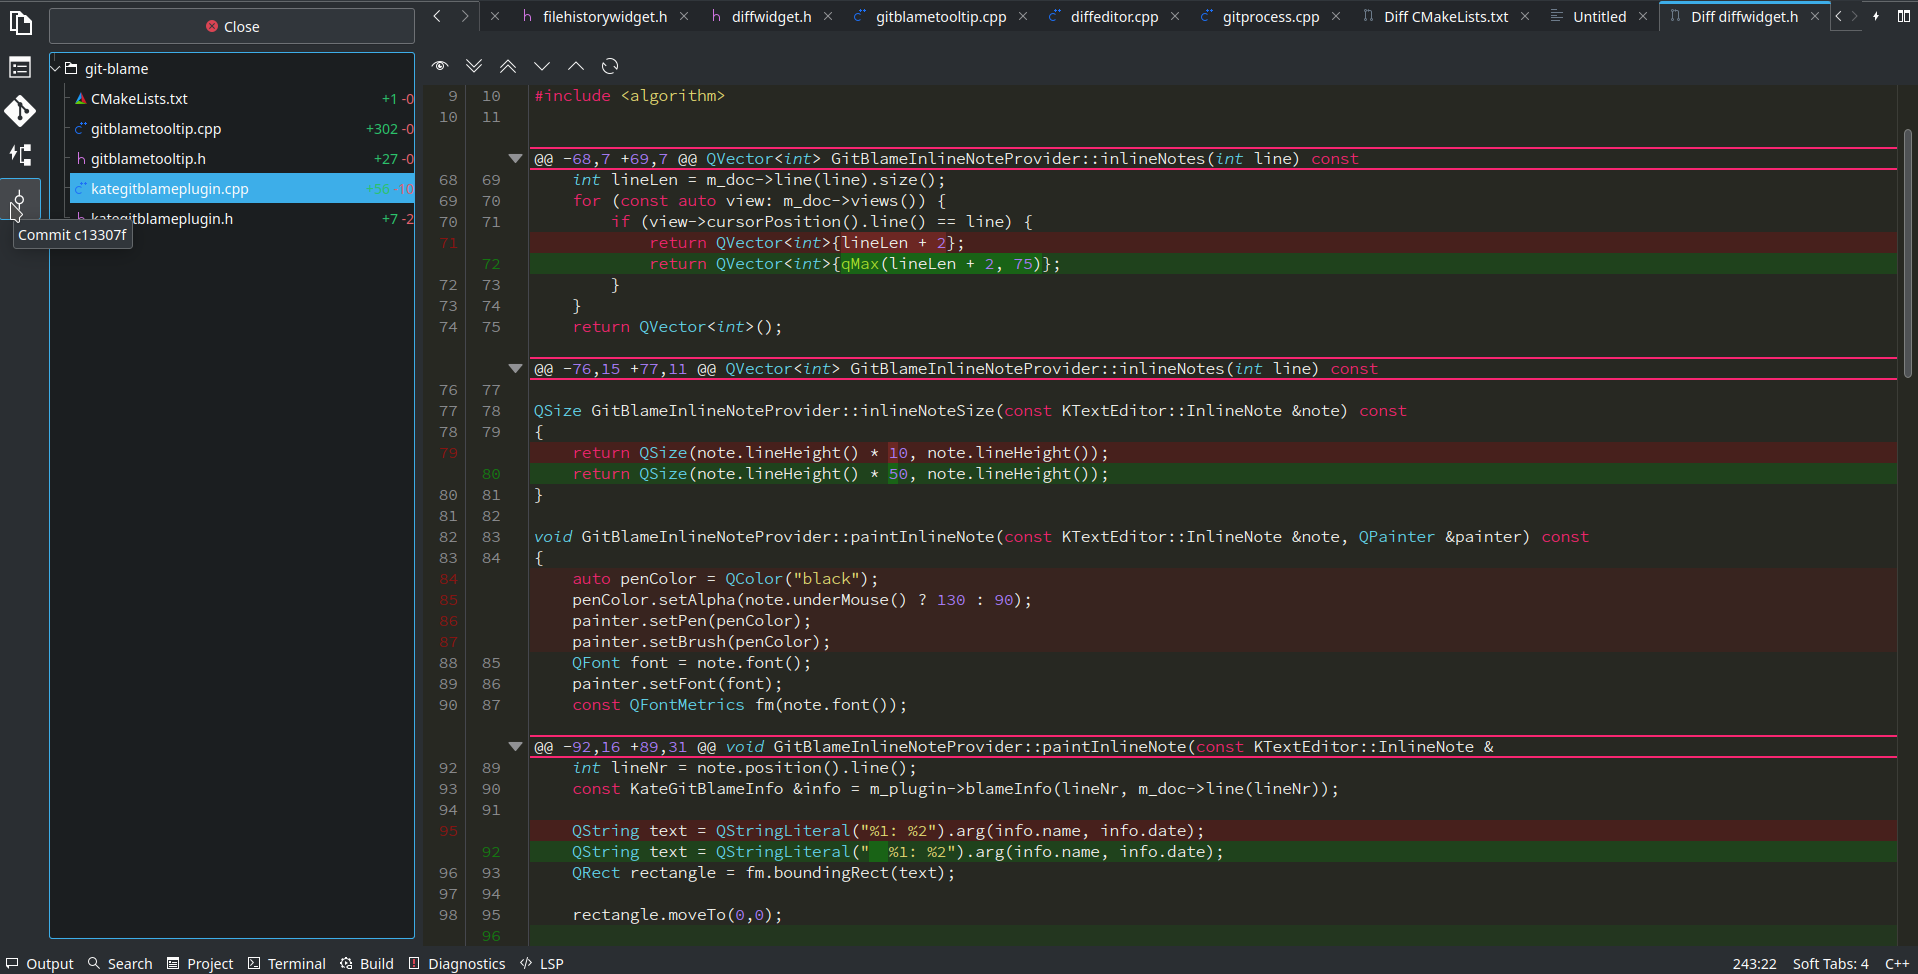
Staging Lines and Hunks
Lines and hunks can be staged from the diff viewer. Simply click "Show diff" on any file in the Git Widget and you will see the following.
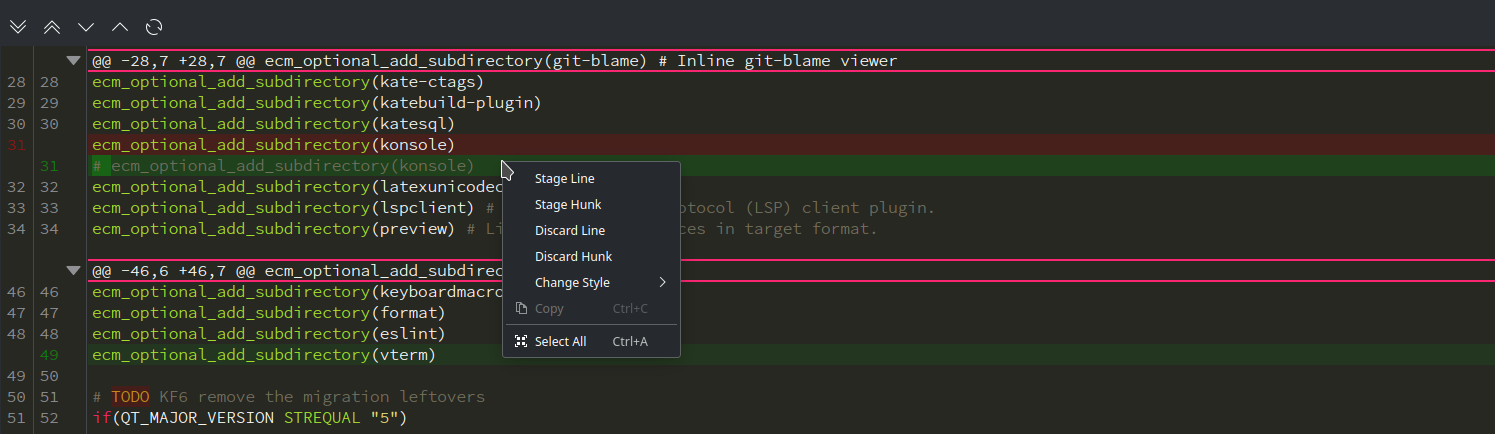
You can then right click on a line and then stage that particular line or hunk.
Git Blame
If you have enabled the git blame plugin, it will show the git blame for each line as you click the line:
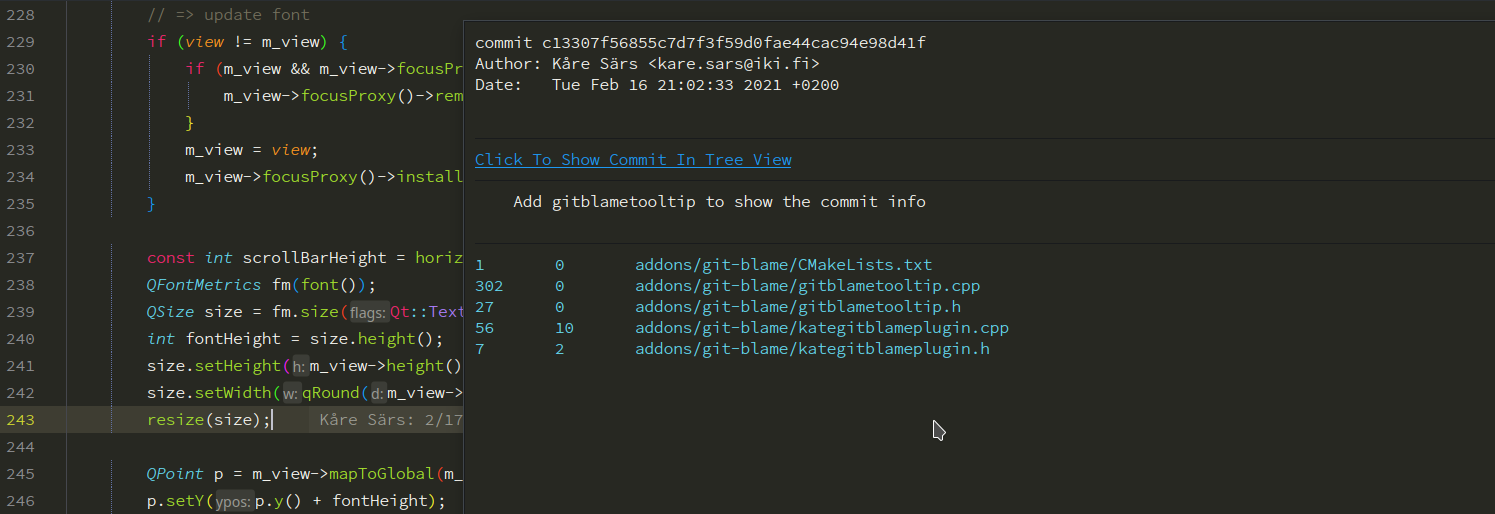
If you click on the blame, you will see a popup which shows the details of that commit. You can also open that commit in the Commit toolview if you want to explore the changes in that commit.
Comments?
A matching thread for this can be found here on r/KDE.