Setup your KDE development environment - kdesrc-build & Kate
KDE's developer experience evolution
Kate (and KDE) is always in need of more contributors.
Over the years we tried to make the development experience more pleasant and move to tools that are more widely adopted by developers around the world.
We traveled from ancient CVS repositories over to Subversion and since years are up and running on Git.
We moved our code hosting to a more beginner friendly GitLab instance in the last year, too.
And I really think this does seem to show effects, at least for Kate & related projects we got a nice influx of contributions over GitLab.
Even just this years for Kate & Co. we merged a nice number of patches:
- 45 patches for KTextEditor
- 22 patches for KSyntaxHighlighting
- 61 patches for Kate
- 6 patches for kate-editor.org
For more details, visit the regularly regenerated merge requests page.
Beside the purely "what VCS do we use" and "which nifty web site for that" do we run, naturally the software components them-self got streamlined.
In the "good old" past, you had a nice thick kdelibs & kdebase repository that you did build to e.g. get Kate and it's parts.
Today, this has been split up into more manageable chunks.
You want to use the good old Kate syntax highlighting in your project? No problem, this is now an own separate framework just relying on Qt.
You want to build Kate? No need to build e.g. KHTML!
Still, the initial setup of a Kate/KDE development environment seems still to be an issue for a lot of beginners.
Kate's current status quo
On our build it page we describe how you can build Kate from kate.git manually on e.g. recent Linux distributions. Beside that we delegate the building on e.g. Windows or macOS to Craft.
I still think the most common developer setup use case is at the moment on Linux (or fellow BSDs). Unfortunately we didn't really keep our build description up-to-date for that, e.g. the package list we mention there is ancient. And we didn't really outline how you can properly build the KDE Frameworks we require if you want to work on them, too.
kdesrc-build for the win!
What could be improved there?
Beside Craft, that is very nifty to use to get stuff build, a tool that actually is in heavy use by KDE developers was somehow ignored in our beginners guide for Kate building: kdesrc-build.
I use kdesrc-build since years for my local compiles and it is prominently promoted for e.g. KDE Applications/Frameworks development.
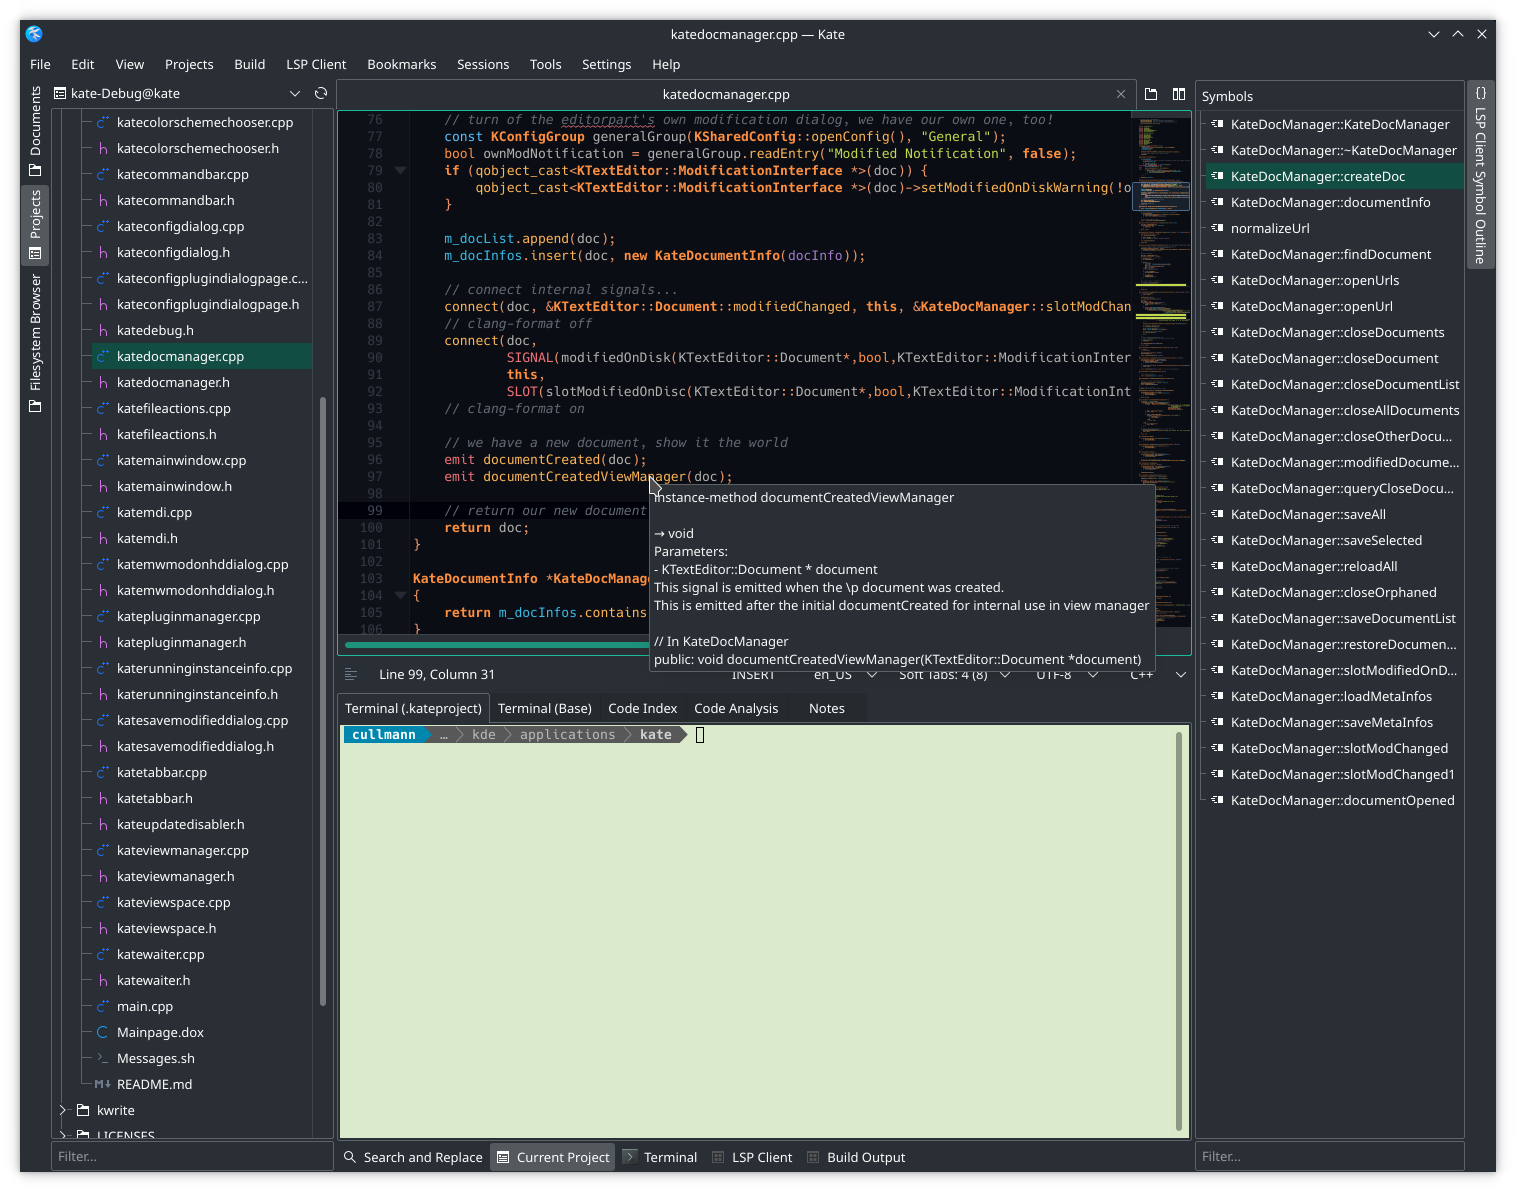
Kate learned some new tricks in the last years, too, that got not really promoted in our build setup guide: we have proper LSP support!
But if you miss to e.g. do some tricks like creating the compilation database via CMake and linking it to the right place, this won't work out of the box so far.
kdesrc-build now has some features to automate this for you!
New Kate development setup best practice
Now, then, let's start to illustrate how the proposed new Linux/BSD/... starter setup shall look.
Choose your KDE development directory
Choose yourself some path where all KDE development things should end up. Beside user local configuration files, nothing outside of this directory will be polluted.
For the remaining parts of this description we use
~/projects/kdeFeel free to customize this.
Install kdesrc-build
Installing is more or less just cloning the current version
mkdir -p ~/projects/kde/src
cd ~/projects/kde/src
git clone https://invent.kde.org/sdk/kdesrc-build.git
For later ease of use, best symlink the kdesrc-build script to some folder inside your path, e.g. if you have some user local bin:
ln -s ~/projects/kde/src/kdesrc-build/kdesrc-build ~/binConfiguring kdesrc-build
kdesrc-build has some setup pass that can configure stuff for you, see this introduction.
Here we just show a .kdesrc-buildrc that is good enough for Kate development needs.
You can just copy and paste the below variant into your home directory as .kdesrc-buildrc and adapt the paths to your needs. If you stick with the ~/projects/kde path we did choose above, this should be usable 1:1.
global
    # use the latest KF5 and Qt5-based software.
    branch-group kf5-qt5

    # we want .kateproject files with ninja
    cmake-options -G "Kate - Ninja"

    # clangd tooling
    compile-commands-export yes
    compile-commands-linking yes

    # Install directory for KDE software
    kdedir ~/projects/kde/usr

    # Directory for downloaded source code
    source-dir ~/projects/kde/src

    # Directory to build KDE into before installing
    # relative to source-dir by default
    build-dir ~/projects/kde/build
end global

include ~/projects/kde/src/kdesrc-build/kf5-frameworks-build-include
include ~/projects/kde/src/kdesrc-build/kf5-applications-build-include
include ~/projects/kde/src/kdesrc-build/kf5-workspace-build-include
include ~/projects/kde/src/kdesrc-build/kf5-extragear-build-include
The important lines to have a good experience developing Kate (or other KDE stuff) with Kate are described below in detail.
Create .kateproject files
    # we want .kateproject files with ninja
    cmake-options -G "Kate - Ninja"
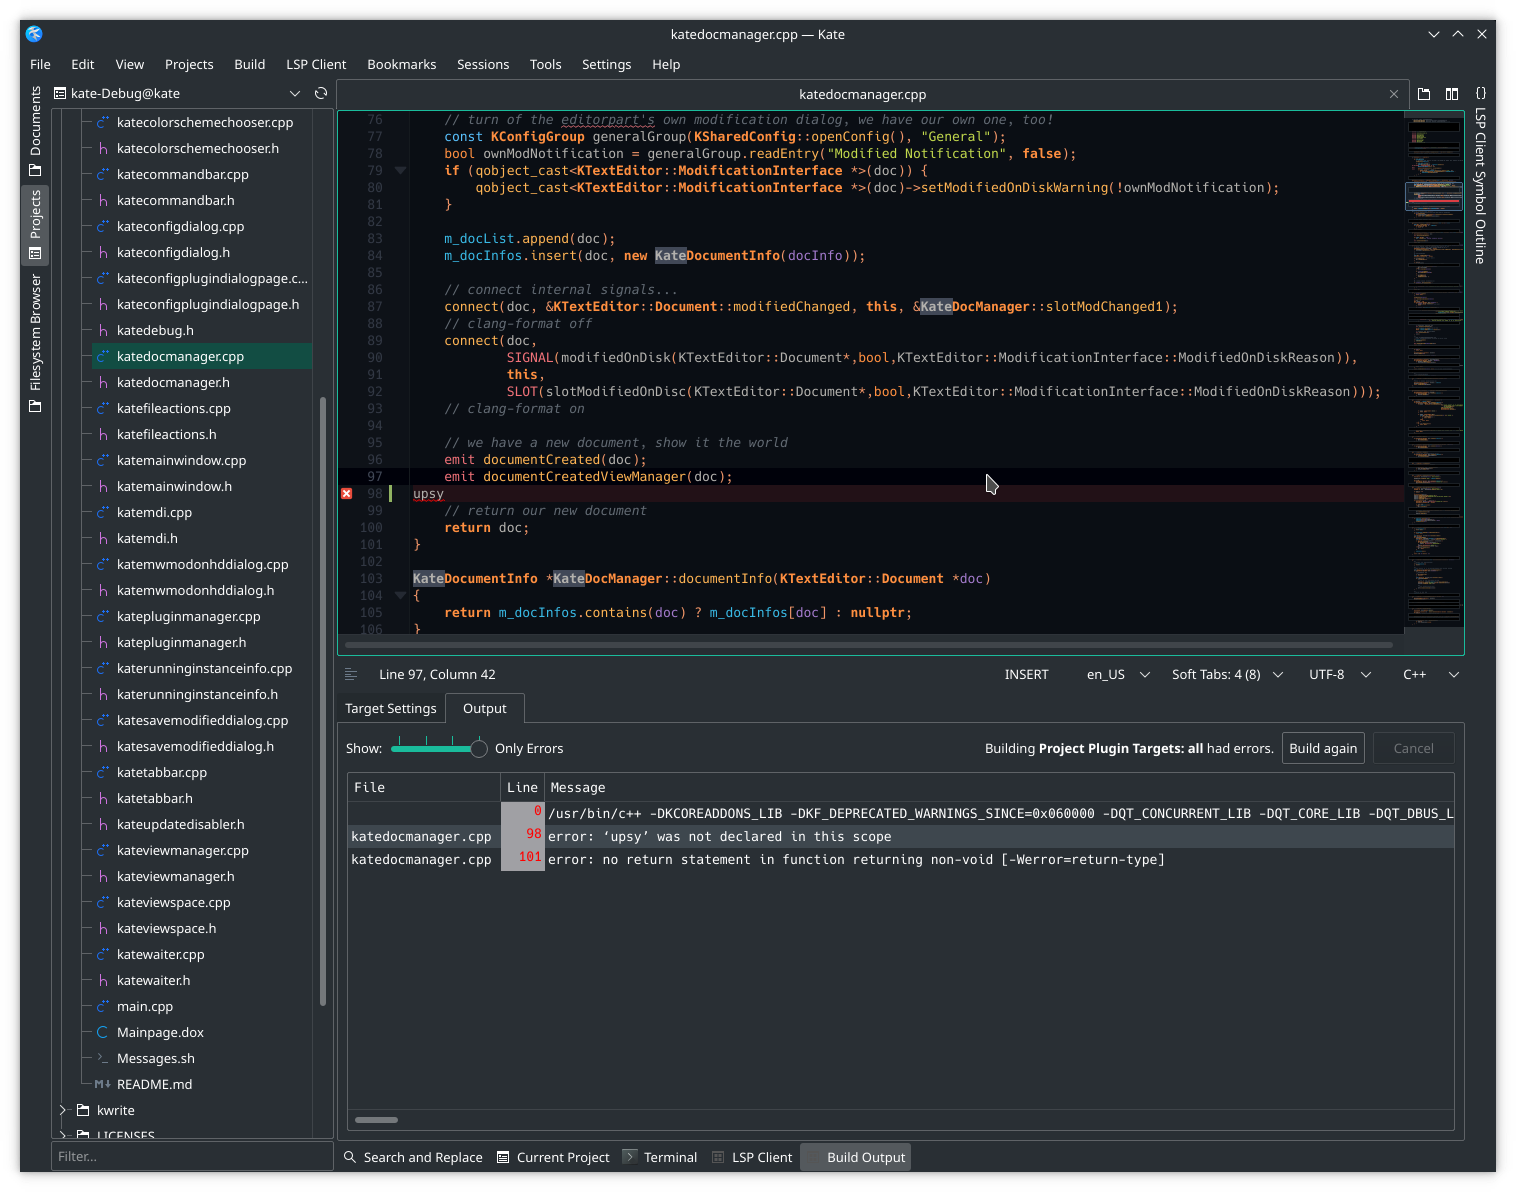
This ensures you get not only Ninja build files (nifty as this will e.g. automatically use multiple cores for compiles) but in addition .kateproject files inside the build directories for later use, too. With this files, the project plugin of Kate will know what to do, e.g. where the source directory for the compile is and which build commands it should use for the build plugin.
Ensure LSP integration works
    # clangd tooling
    compile-commands-export yes
    compile-commands-linking yes
This ensures CMake will generate the compile_commands.json files that are required for clangd based LSP integration. Beside just generating them inside the build directory the linking option will symlink them back to your source directories. This allows zero-configuration usage of the LSP plugin inside Kate (and other editors).
Install needed dependencies
kdesrc-build provides some initial setup mode to install the needed packages for several common distributions to start developing. To do that, just trigger:
kdesrc-build --initial-setupWe already created a .kdesrc-buildrc, that will be left untouched. For the further usage you don't need to modify your shell settings either.
Build Kate & dependencies
To trigger a compile of Kate and all needed KDE dependencies now just type:
kdesrc-build --include-dependencies kateFor me, this did now compile 76 modules ;) That takes a few minutes on a recent machine. Time to grab some coffee or think about what you actually want to implement.
If you only want to build Kate without the dependencies because you are sure you have recent enough stuff on your system, you can try:
kdesrc-build --no-include-dependencies kateBut given that on modern machines, the compile times are low, it is more convenient to just build all stuff, that ensures you have e.g. the latest and best KSyntaxHighlighting and KTextEditor frameworks around, too!
How to use the build stuff?
To launch you local Kate version, you need to setup the environment first properly to ensure the right plugins and stuff is loaded. Fortunately this is very simple:
source ~/projects/kde/build/kde/applications/kate/prefix.sh
kate
A nifty way to wrap this is to e.g. create yourself a small wrapper script to start your master branch version of Kate inside your local bin directory:
#!/bin/bash
source ~/projects/kde/build/kde/applications/kate/prefix.sh
exec kate "$@"
Keep your stuff up-to-date
To keep your local version up-to-date, you can just use the above commands again. They will take care of pulling new changes from the KDE repositories and building/installing them into your local prefix.
Develop!
Now, the remaining question is: How to develop best?
Naturally, if you want to hack on Kate, it might make sense to use Kate for that.
Given the above preparations, that is easy to do, just start your new master version of Kate and pass it the build directory:
kate ~/projects/kde/build/kde/applications/kateAlternatively, you can navigate there in your terminal and startup Kate from there, it will auto-open it:
cd ~/projects/kde/build/kde/applications/kate
kate
To have the best experience with this, ensure you have at least project & LSP plugin enabled. If you like to have some GUI build integration, activate the build plugin, too.
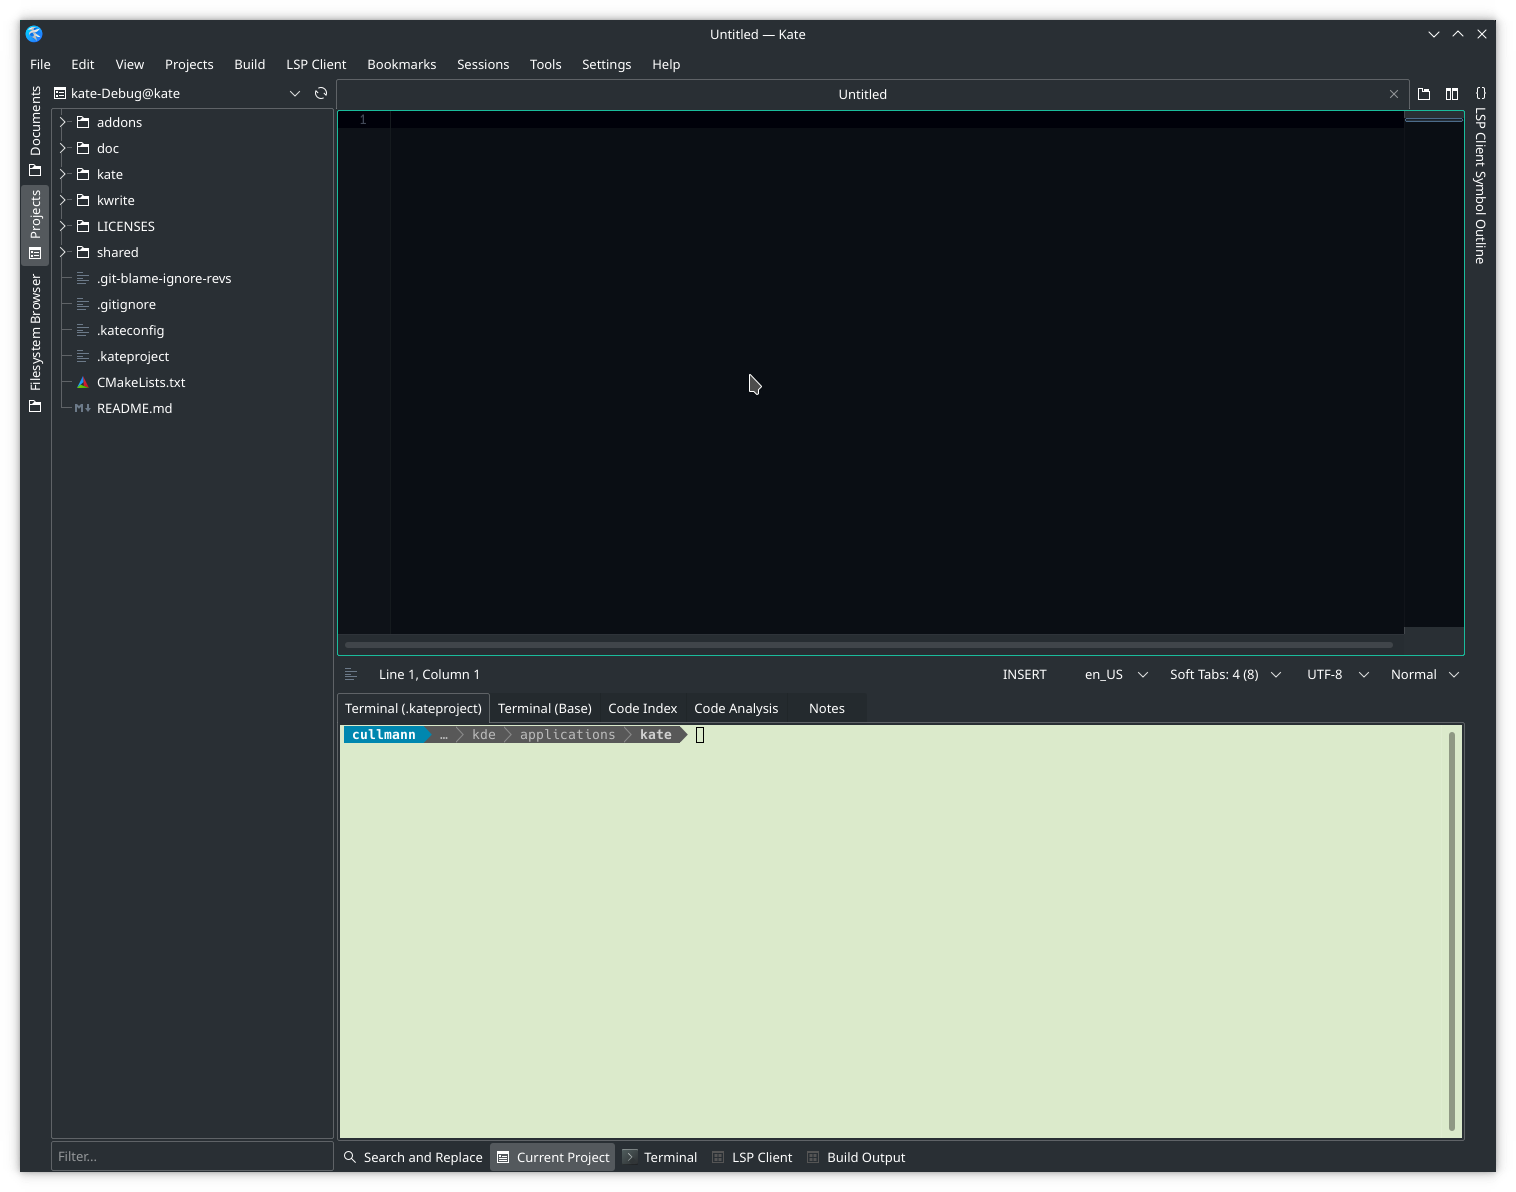
You will end up with a new Kate windows like shown below.
In the lower "Current Project" tool view you have per default two terminals. The first terminal is inside your build directory, here you can e.g. run your ninja and ninja install commands and such. The second terminal is inside your source directory, perfect for e.g. git command line calls.
Given the above setup, the LSP plugin (if you have clangd installed) should work out of the box.
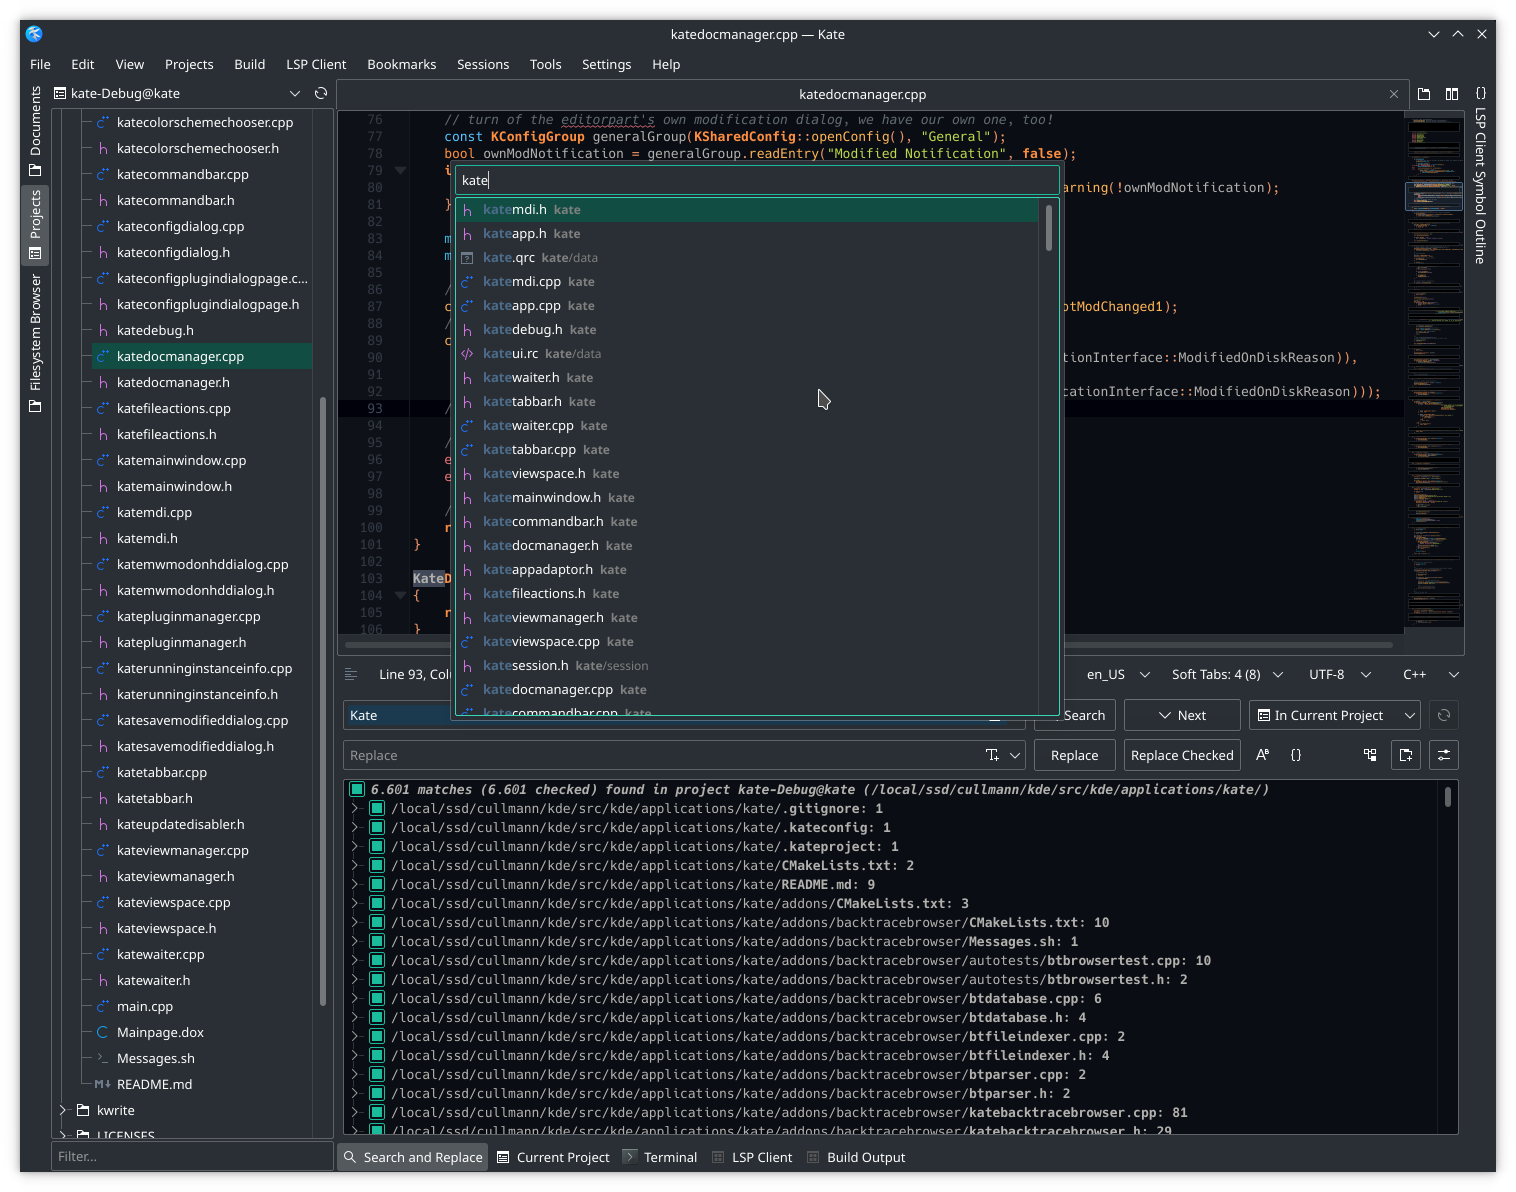
Other nifty stuff like project wide quick open, search & replace and correct build targets should be setup, too.
Future work
We will update our build it guide based on the above setup. I think the kdesrc-build variant is the most easy way to get started for beginners on Unices. Naturally, if you don't like to use that, you can do all stuff manually, too, that won't change.
Beside this, there is ongoing work in the project plugin to allow you to handle multiple projects at once easier, e.g. to have one meta project linking the individual ones. But that support is still not fully ready.
Now: Start Hacking!
Show up and contribute.
We have a lot of ideas and need help to get them done!
Or even better: show up with ideas on your own and discuss/implement them with us.
Comments?
A matching thread for this can be found here on r/KDE.


