Coming in 4.13: Improvements in the project plugin
Since version 4.10 Kate comes with a simple project plugin, as introduced here .
The project plugin works by automatically reading a simple json file and providing the information found there to various parts and plugins in Kate.
“Opening” a project
Projects are opened automatically by Kate. Whenever a file is opened, Kate goes the directories from that file upwards until it finds a file named .kateproject , which defines the project. This is a simple json file, which is intended to be written manually by the user.
The .kateproject file defines the name of the project, the set of files which belong to the project, and optionally commands for the build plugin .
In 4.13, “out-of-source” project files are now also supported (actually already in 4.12). What does that mean ? You can create a .kateproject file in some directory, but it will refer to a different directory as root of the project. This is useful if you have multiple build trees for one source tree, and then need different build commands for each build tree.
Creating such a .kateproject file is easy, simply add a top-level “directory” entry:
{
    "name": "MyProject",
    "directory": "/home/alex/src/myproject",
    "files": [ { "filters": [ "*.cpp", "*.h"] } ]
}
So if you create this file e.g. in /home/alex/src/myproject-build/.kateproject, once the project is opened, the files below /home/alex/src/myproject/ will belong to the project “MyProject”. Again, to “open” this project, open any file in the same directory as the .kateproject file or any of its subdirectories in Kate. Kate will again automatically find the .kateproject file and load it.
Support for the improved build plugin
In 4.13 the build plugin has seen several improvements, the main one being that it is now possible to define an arbitrary number of targets, instead of being limited to 3. This is fully supported by the project plugin. Also the “old” format is still fully supported, and the .kateproject files can even contain both the old and the new format, so it works with the build plugin in version before 4.13 and also after.
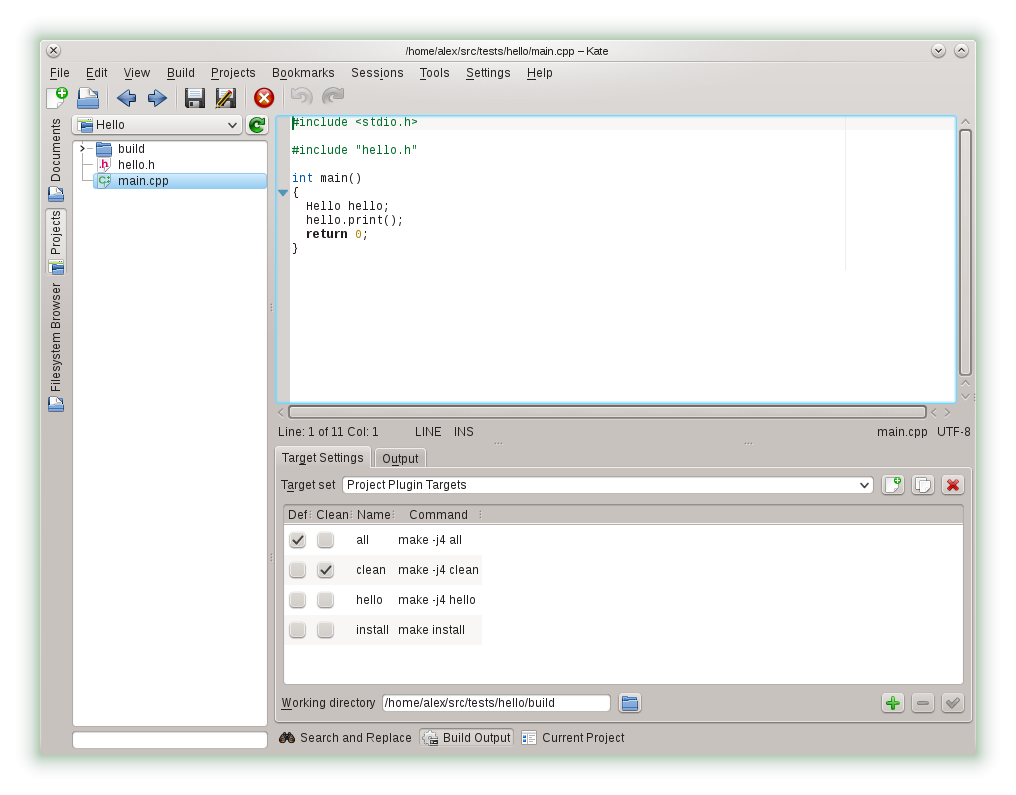
Below there is a simple example for a hello-world project, which defines 4 targets for the build plugin: build all, clean, install and building just “hello”:
{
    "name": "Hello",
    "files": [ { "filters": [ "*.cpp", "*.h"] } ],

    "build": {
        "directory": "/home/alex/src/tests/hello/build",
        "targets":[
             {"name":"all", "build_cmd":"make -j4 all"}
            ,{"name":"clean", "build_cmd":"make -j4 clean"}
            ,{"name":"hello", "build_cmd":"make -j4 hello"}
            ,{"name":"install", "build_cmd":"make install"}
        ],
        "default_target": "all",
        "clean_target": "clean"
    }
}
So, for each target, a “name” and a “build_cmd” is defined, and that’s it. One of the targets can be chosen to be the default target (which can be assigned a dedicated shortcut in the build plugin), and one can be chosen to be the “clean” target (again, which can be assigned a dedicated shortcut in the build plugin).
The screenshot below shows what you get when opening this project in Kate:
 ][1]
][1]I mentioned above that both the “old” and the new build plugin can be supported within one .kateproject file. To do that, simply put both target definitions in the file, they don’t interfer:
{
    "name": "Hello",
    "files": [ { "filters": [ "*.cpp", "*.h"] } ],

    "build": {
        "directory": "/home/alex/src/tests/hello/build",
        "targets":[
             {"name":"all", "build_cmd":"make -j4 all"}
            ,{"name":"clean", "build_cmd":"make -j4 clean"}
            ,{"name":"hello", "build_cmd":"make -j4 hello"}
            ,{"name":"install", "build_cmd":"make install"}
        ],
        "default_target": "all",
        "clean_target": "clean",

        "build": "make -j4 all",
        "clean": "make -j4 clean",
        "quick": "make -j4 install",
    }
}
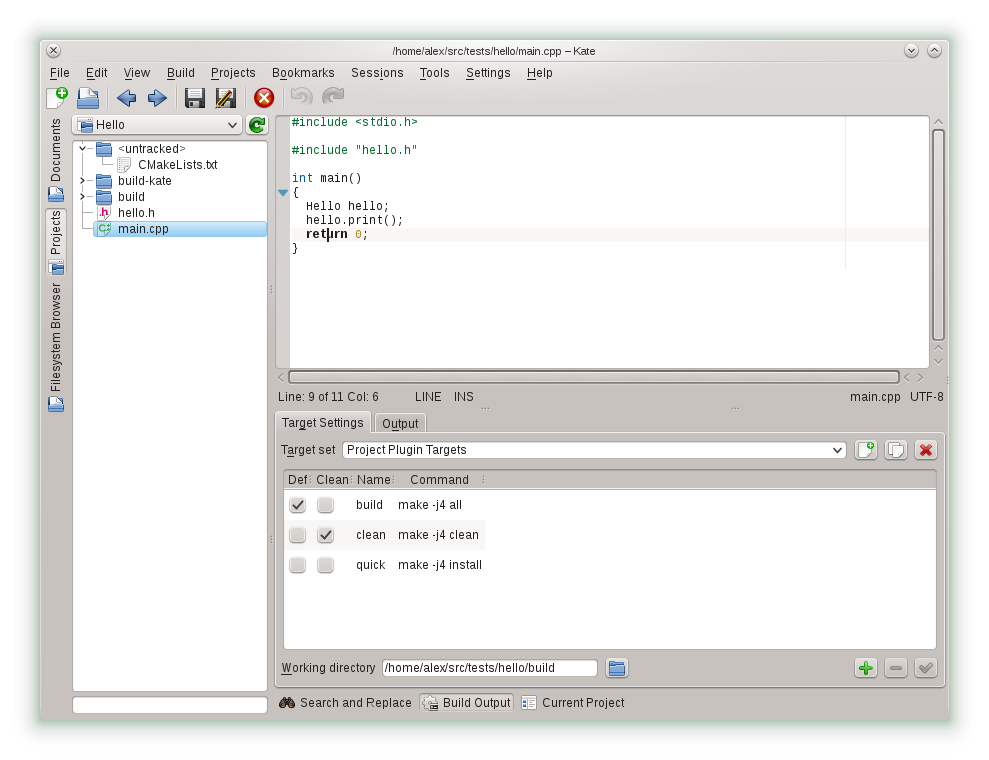
Here, additionally to the 4 custom build targets, the three hardcoded targets “build”, “clean” and “quick” for the “old” build plugin are defined. When this project is opened in Kate 4.13 or newer, these three old entries are ignored, and only the four new entries are used. When this project is opened in Kat 4.12 or earlier, the four new targets are ignored and only the old ones are used.
In the case that an “old” .kateproject file is opened, which contains only the old entries, these are used, and the three entries are used to create three targets, as shown in the screenshot below:
 ][2]
][2]
Using the project plugin with CMake-based projects
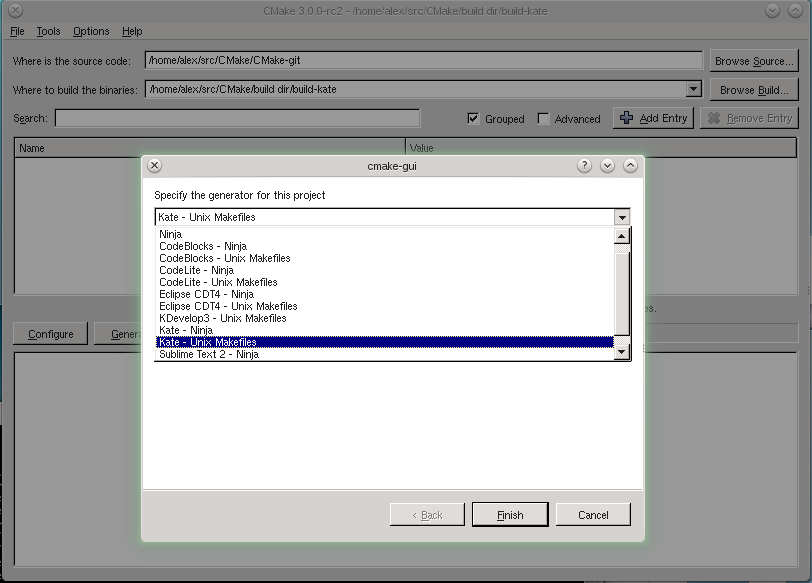
Until now, the only way to create .kateproject files was to write them manually. If you are using Kate with C/C++ projects which are built using CMake, there are more news for you. CMake 3.0.0 will be released soon, and among others, it will contain a generator for, guess what: project files for the Kate project plugin! With that, run CMake, select “Kate – Unix Makefiles” as generator, and there you go, everything set up ready to use for you, including all targets of the project available in the build plugin.
Below is a screenshot showing running cmake-gui on CMake itself:
 ][3]
][3]As you can see, ninja is also supported.
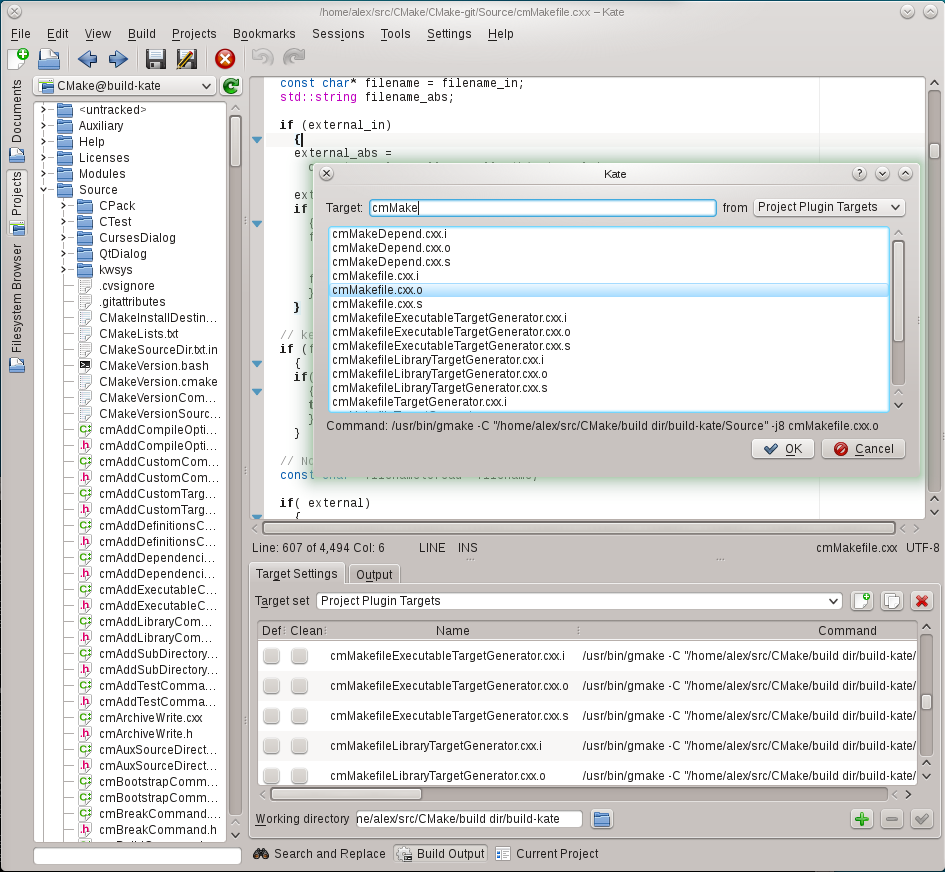
Personally I still prefer Makefiles, especially for use with Kate projects. When using the Makefile generator, you get build targets for compiling every individual source file into an object file. This can save a lot of time when working on some source file and trying to get it to compile. Instead of starting to build everything, which involves dependency checking, and linking afterwards, you can simply just compile that one file (via the quick target select dialog of the updated build plugin), and if it failed, simply build the previous target again (there’s a shortcut for that) until it compiles, and then switch back to building everything (by building the default target).
In the screenshot below you can see Kate having loaded the project for CMake itself, listing the whole bunch of source files on the left, a long list of available build targets in the lower part, and the select-target-dialog on top, filtered already and the target for compiling cmMakefile.cxx is selected.
 ][5]
][5]
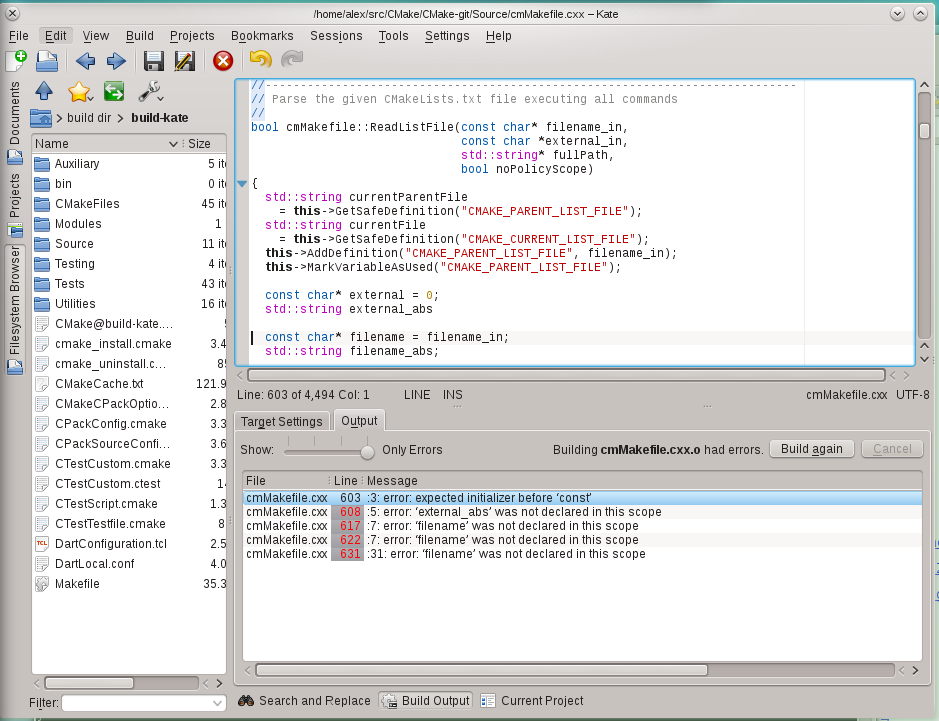
After trying to compile the file, Kate shows you which errors occurred, and using a dedicated shortcut (I set it to F9) it jumps to the line in the code:
 ][6]
][6]As can be seen, there is the parsed error, the status tells you that there were errors when building the target “cmMakefile.cxx.o”, and if you want to try again, there’s a “Build again” button right there.
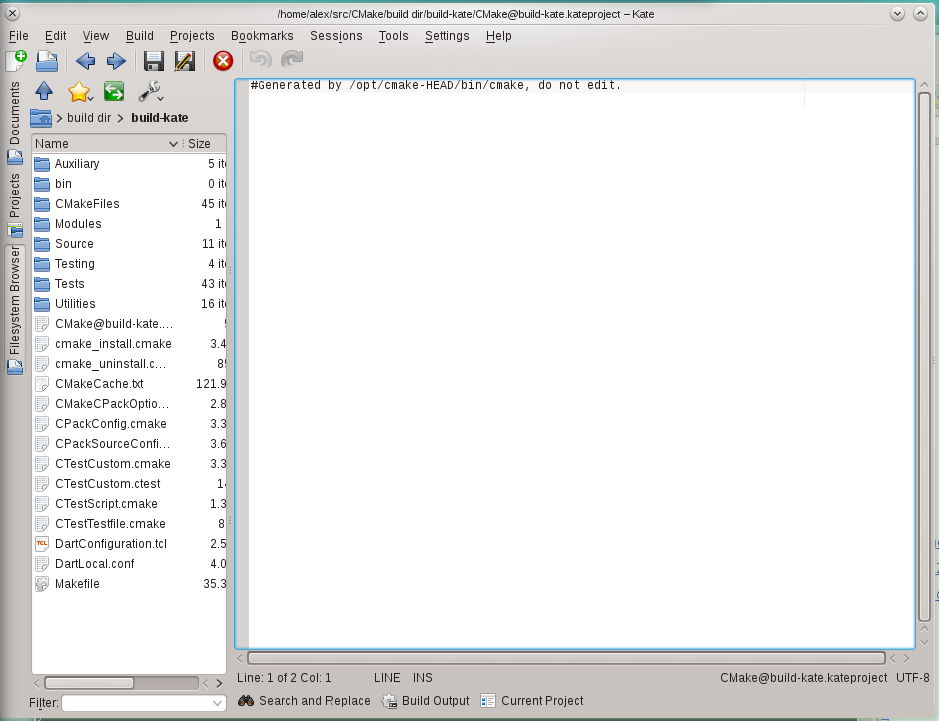
Now, how do you actually open CMake-generated projects in Kate? The .kateproject file is generated in the build tree, and usually you never have to open any files from the build tree in Kate. But to open the project in Kate, you have to open any, at least one, file from the build tree (this will trigger searching the .kateproject file, which will point the project plugin to the source tree). To help with this, CMake additionally generates a file “ProjectName@buildDirectory.kateproject” in the top level build dir, right next to the generated .kateproject file. Open this file, and Kate loads the project.
 ][7]
][7]This has been done in the screenshot above, and already you’re ready to go !
Documentation
Last but not least, starting with 4.13, you can find documentation for the project json file in
So that’s it for now, I hope you find the new stuff useful. :-)